How to Add a Website from an Agency Account
Agency accounts in Hunnt AI allow you to manage multiple websites from a single dashboard. Each website can have its own allocated resources such as article credits and Technical SEO monitoring.
This guide explains step by step how an agency can add a new website and connect it with Hunnt AI.
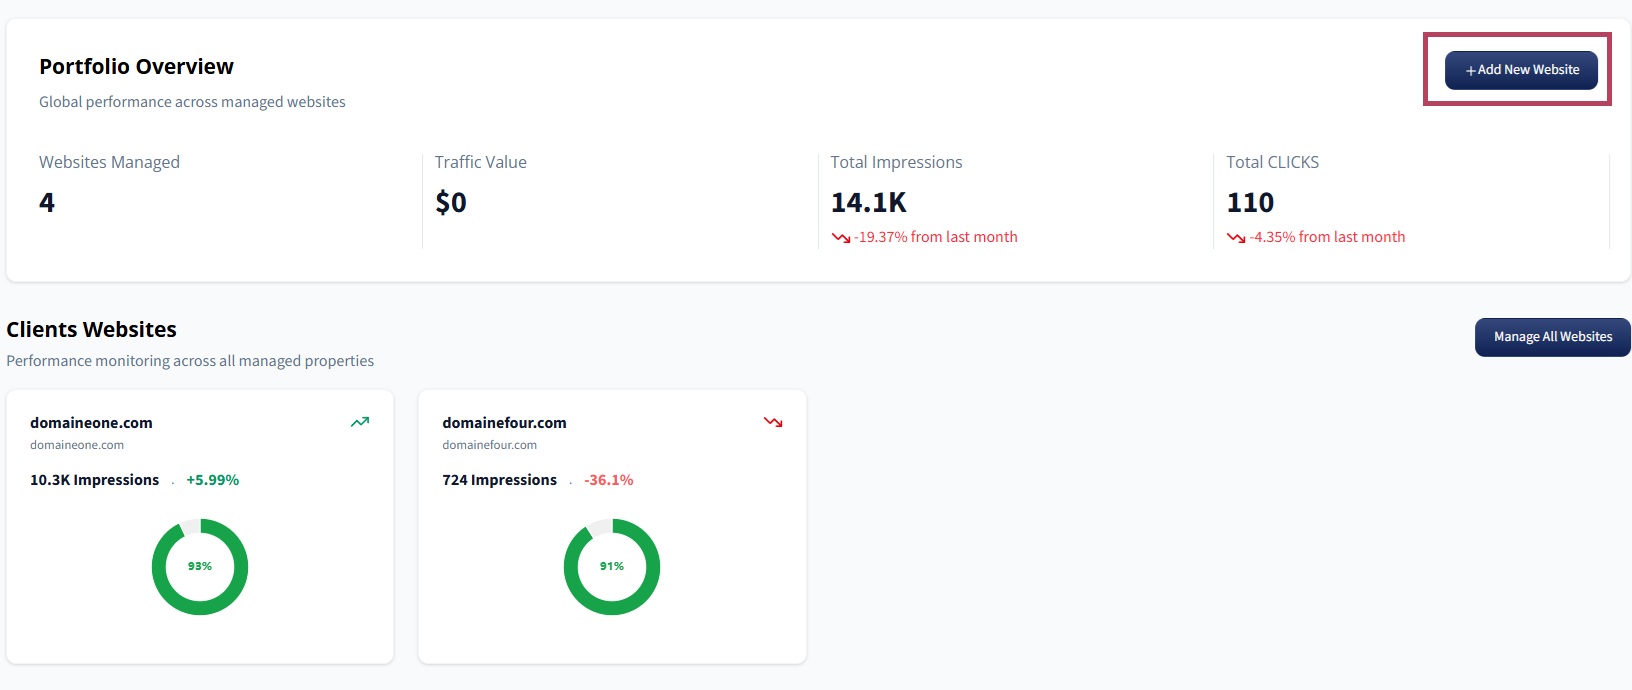
Step 1: Click "Add New Website"
From your Agency Dashboard, go to the Portfolio Overview or Clients Websites section and click the Add New Website button.
This will open the website setup wizard where you can connect your domain and configure the project.
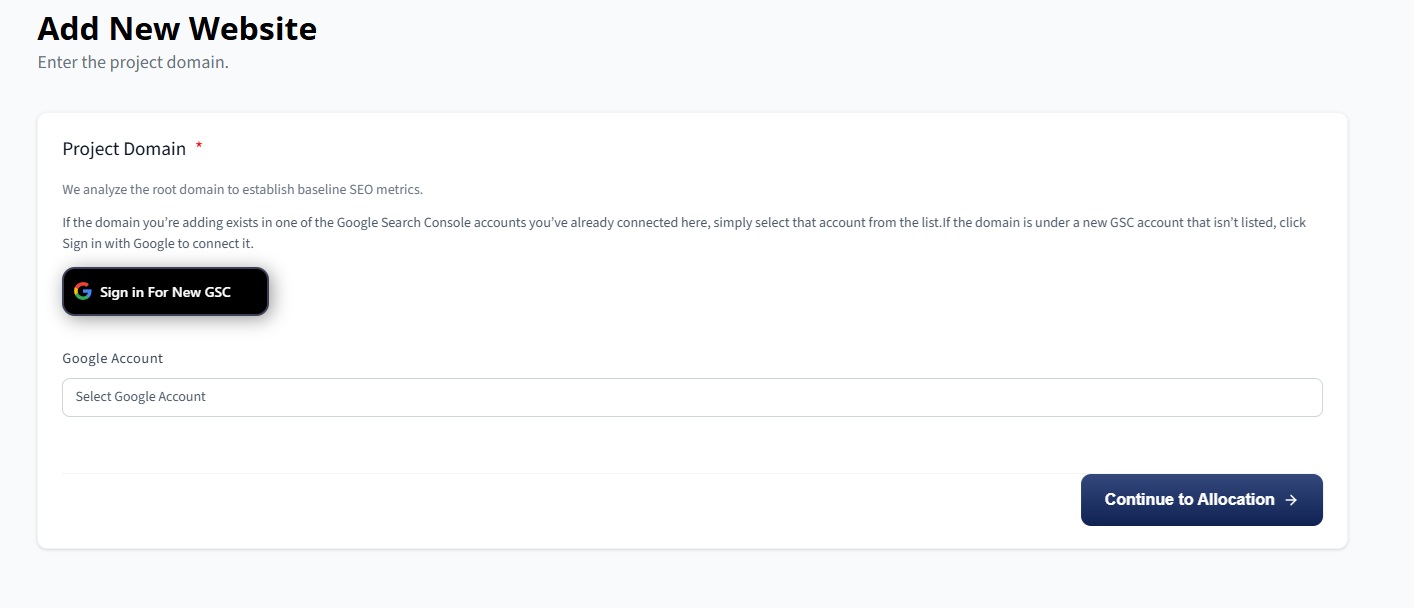
Step 2: Connect Google Search Console
Next, sign in using the Google Search Console account that contains the domain you want to add.
After signing in, select the account and choose the domain you want to connect to Hunnt AI.
Hunnt AI uses Google Search Console data to establish baseline SEO metrics and monitor your website’s search performance.
Step 3: Allocate Website Credits
In this step, you will assign resources from your Agency Plan to the new website.
- Select the number of articles you want to allocate for this website.
- Choose whether to enable Technical SEO monitoring.
These credits will be used later when generating AI articles or running automated SEO improvements for the website.
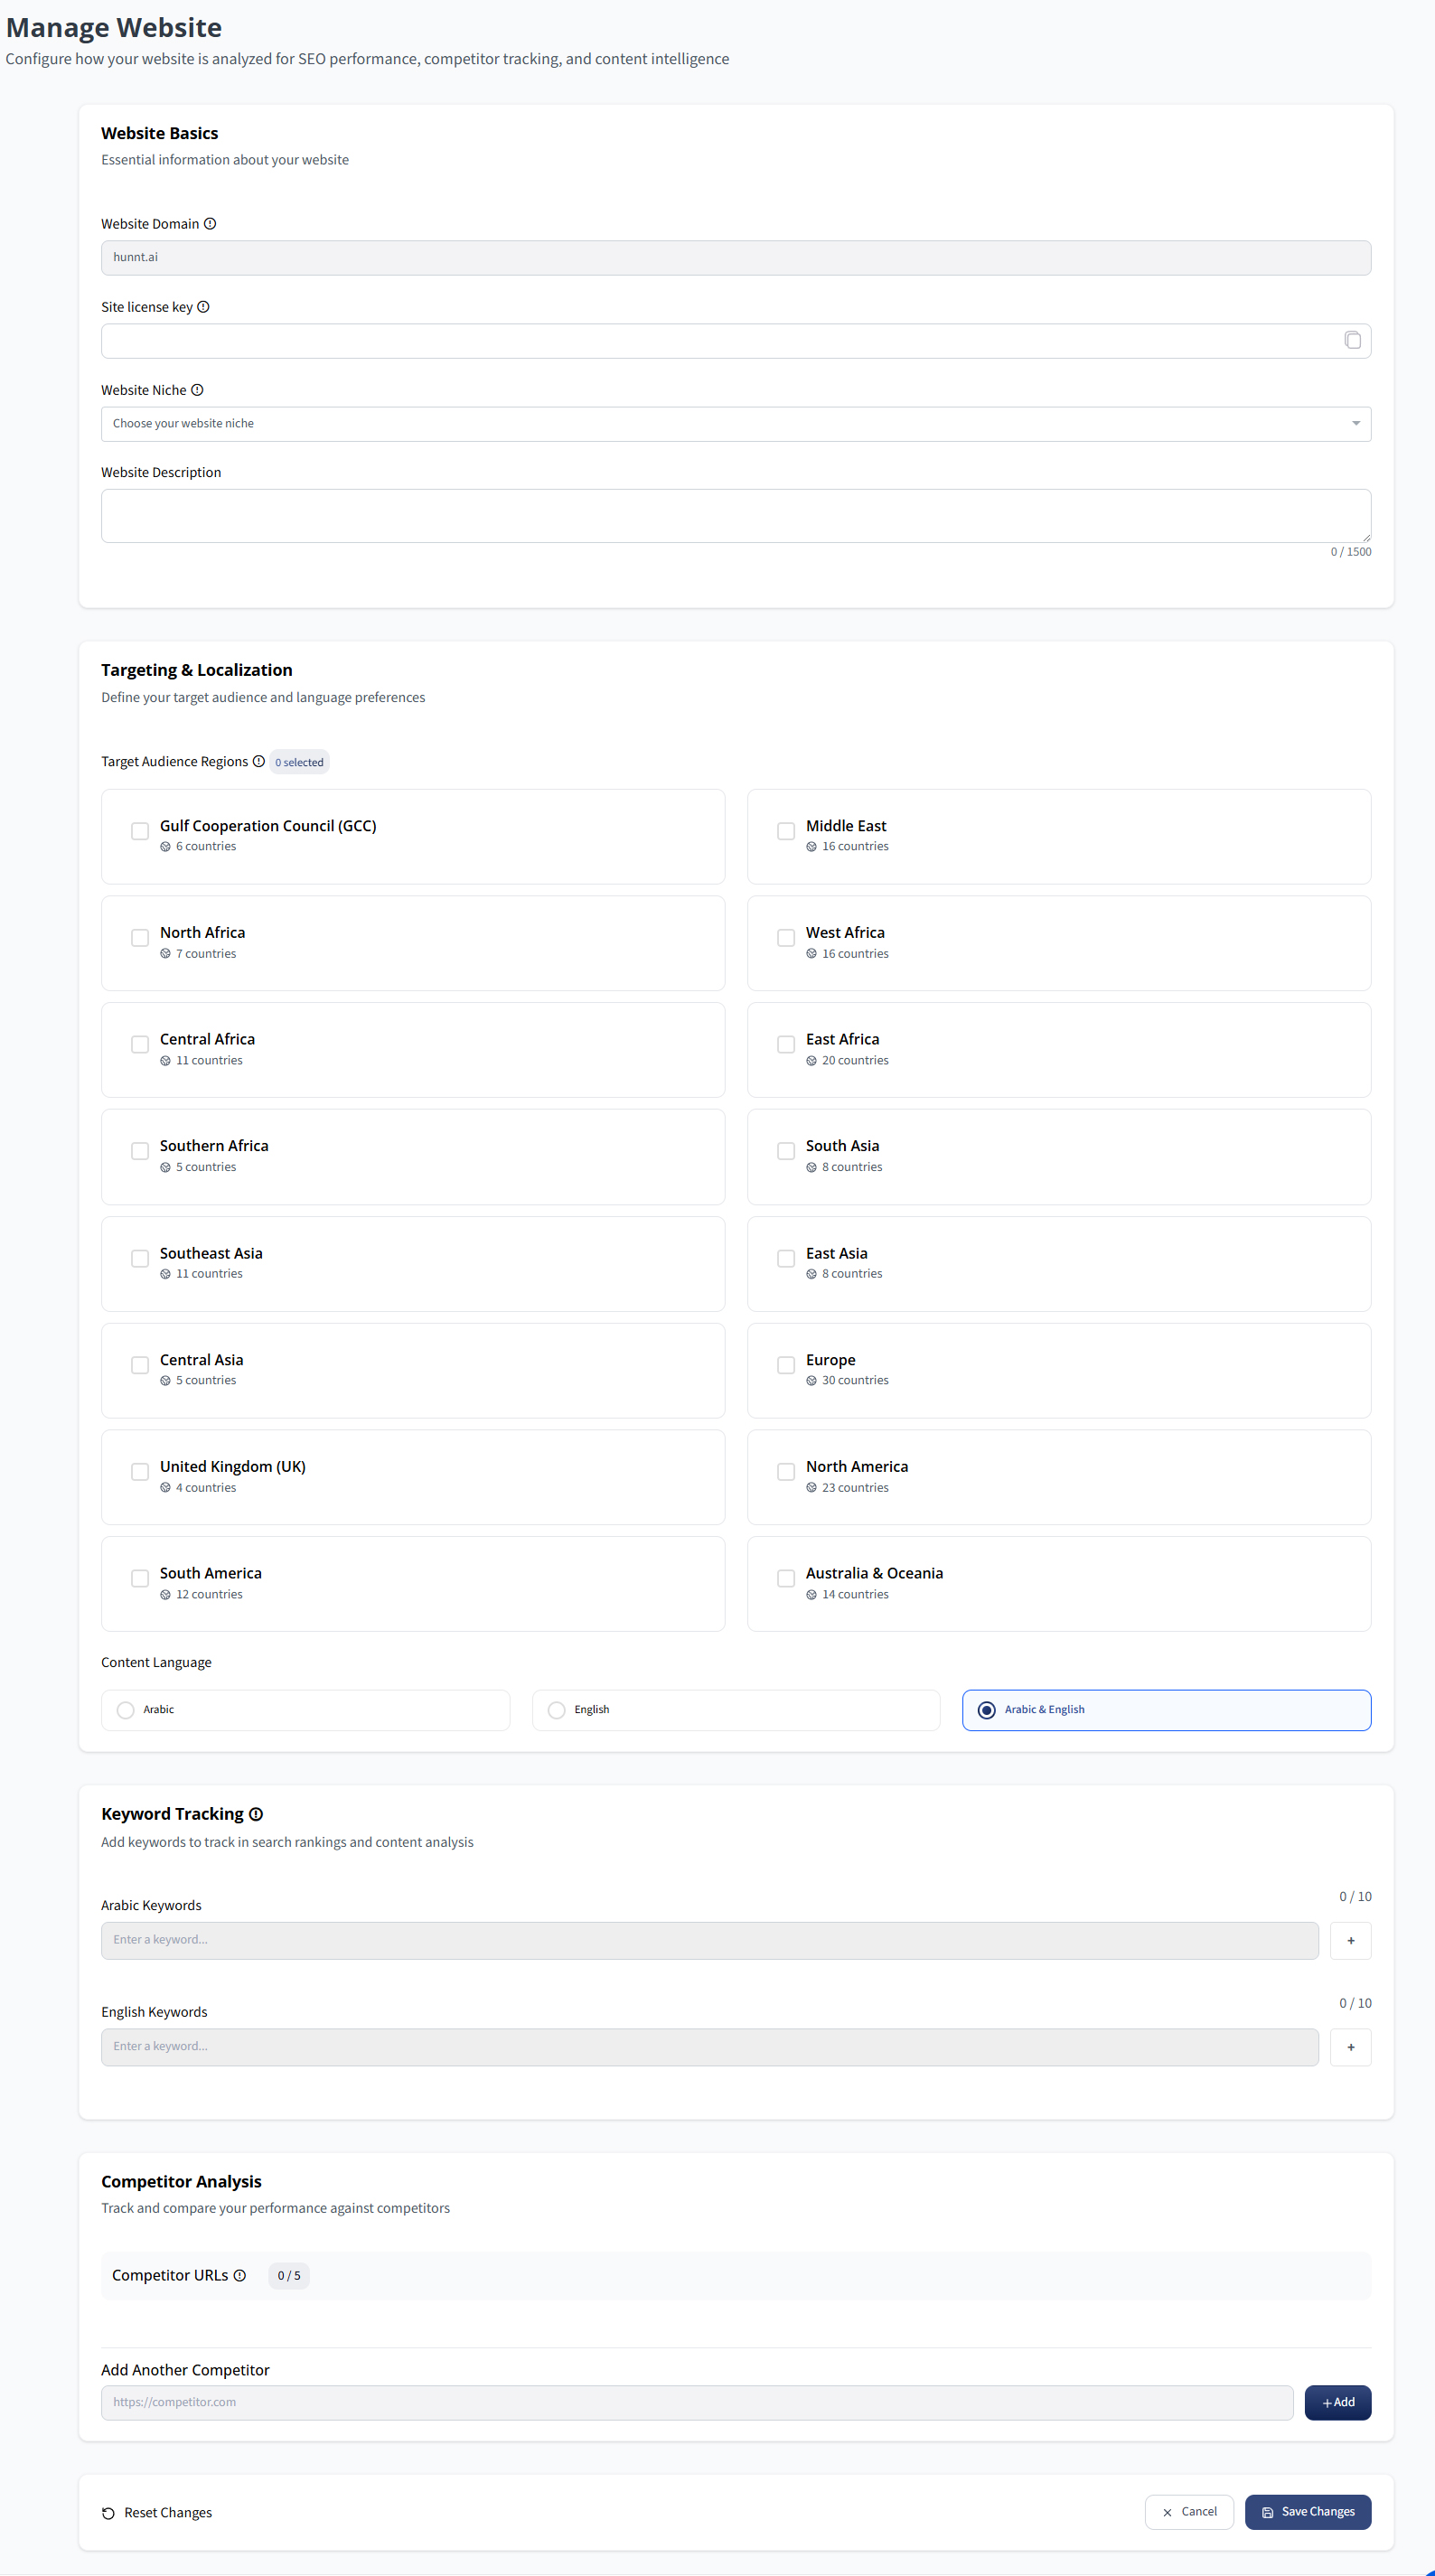
Step 4: Configure Website Information
Next, you will enter the essential website information that helps Hunnt AI understand your website and perform accurate analysis.
These settings include:
- Website description
- Target regions
- Content language
- Keywords to track
- Competitor URLs
Providing accurate information here allows Hunnt AI to deliver better SEO insights, competitor analysis, and content recommendations.
For a detailed explanation of these fields, read the following guide:
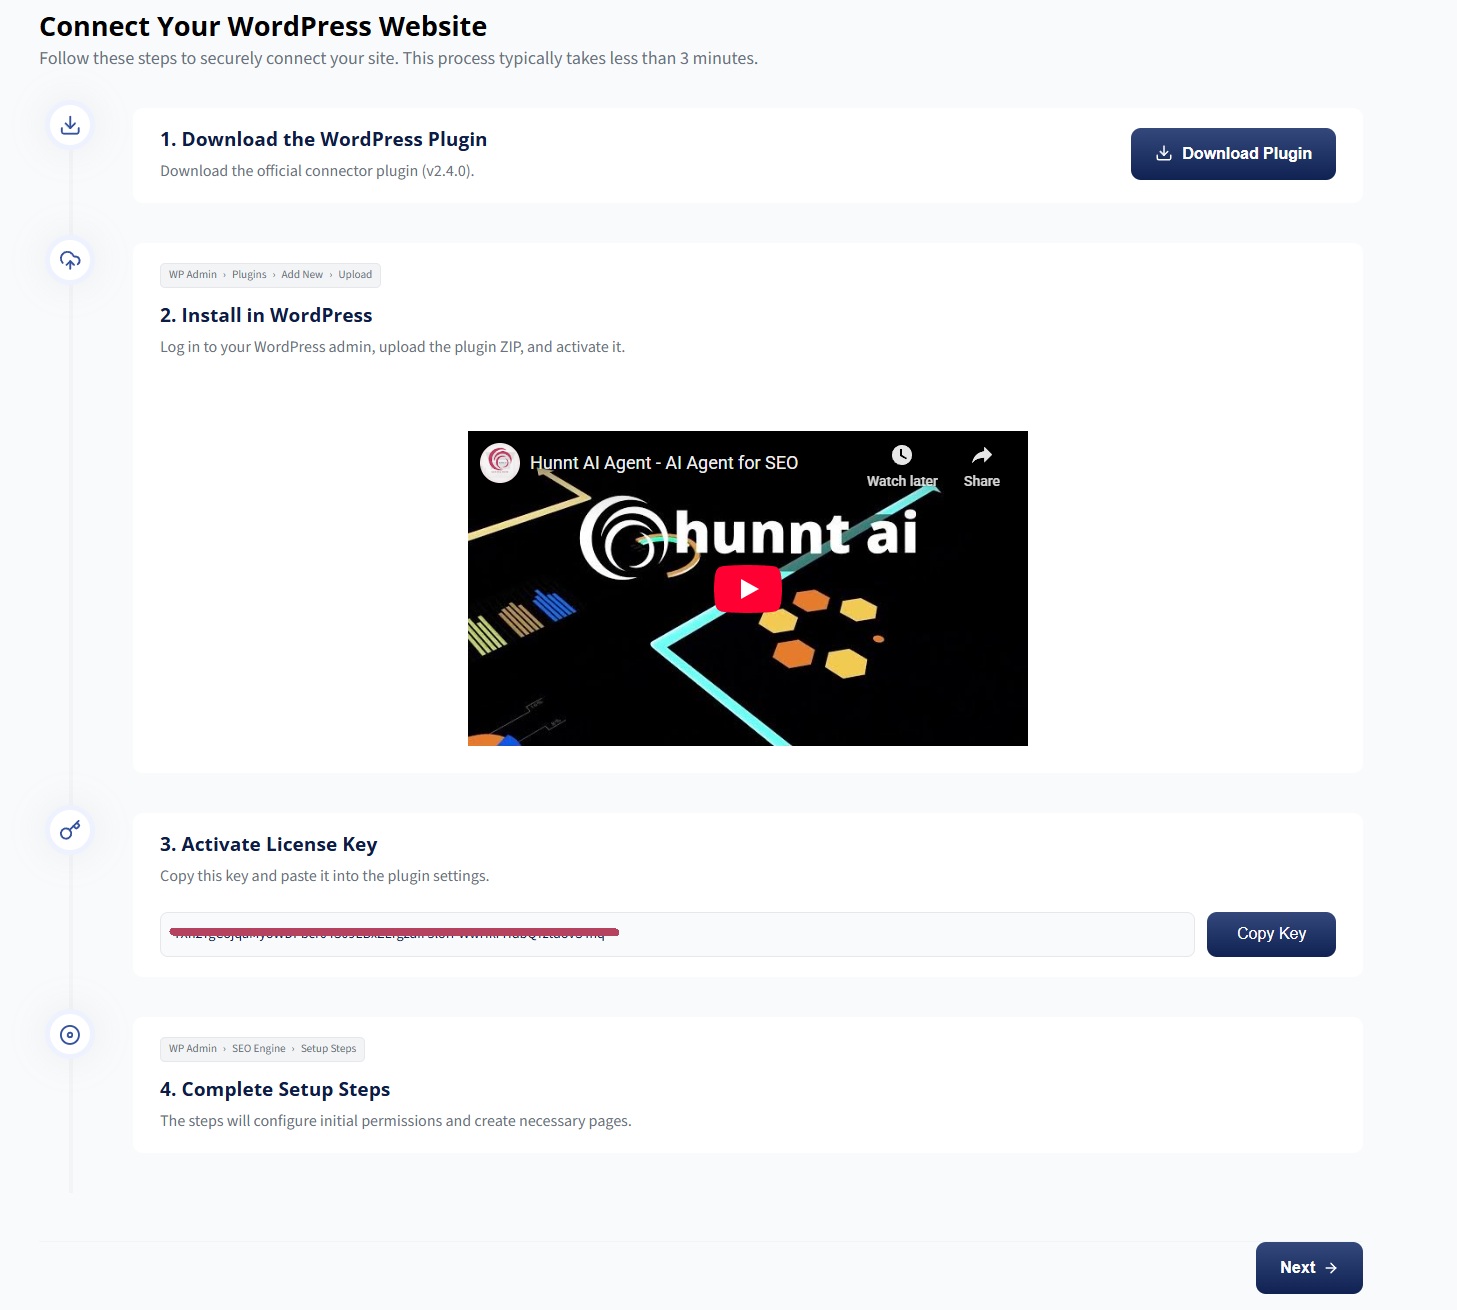
Step 5: Install the Hunnt AI WordPress Plugin
To complete the connection, install the Hunnt AI WordPress Plugin on your website.
After installing the plugin, copy the License Key from the website settings in your Hunnt AI dashboard and paste it into the plugin configuration page inside your WordPress admin panel.
This step allows Hunnt AI to connect with your website, sync data, generate articles, and apply Technical SEO improvements automatically.
You can follow the full plugin configuration guide here:
Configure Hunnt AI WordPress Plugin
Setup Complete
Congratulations!
Your website has now been successfully added and connected to Hunnt AI. You can now manage the website, generate articles, monitor SEO performance, and run Technical SEO automation directly from your dashboard.